

But then I started getting into brushes and when you try to search for brushes online a "how to take care of your brushes" page always pops up.
When to clean your brushes?
You should clean your brushes at least once a weak. But if you're using liquid make up you might want to clean it after use so bacteria won't build up in the brush and cause you to break out the next time you use it.
What should you use to clean your brushes?

How to clean them?


Now that that's out of the way, we go to the DIY Cleaning Board and Dry Rack.
You can buy them online or at some stores but if you're stingy like me try making the DIY. :P

Brush Egg @ Beauty Cosmetics PHP100 + shipping fee

Brush Tree @ Beauty Cosmetics PHP950 + shipping fee

Brush Rack @ Miss Bella PH PHP180 + Shipping fee

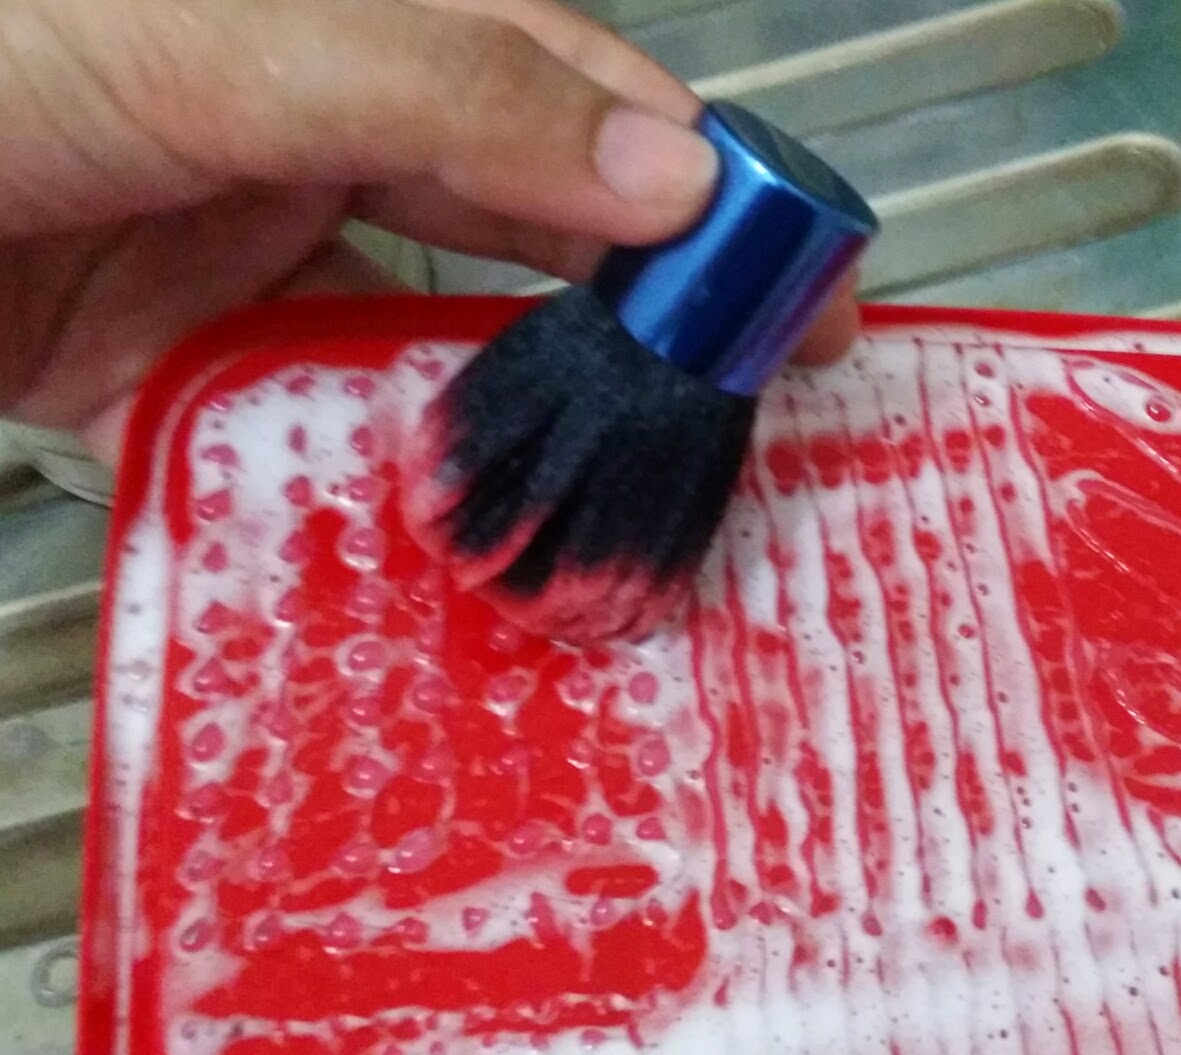
Here I used the cover on a box of crackers.

Then I drew dots and lines and curve patterns on the cover with the glue gun. And there you have a brush cleaning board.
It doesn't look as pretty as a brush egg but it does it's job pretty well.
For the rack I used some rubber bands and an old oval template.


Again it doesn't look pretty but it works. You can probably make them more presentable. Creativity is your limit.
I didn't spend anything for these since I just used materials I found at home. It pays to be creative. XD I hope this helps. :)
Credits: I found these amazing DIYs on youtube and pinterest. :)
No comments:
Post a Comment